 oirae Moss
5 July 2026, 4 min read
The Best Plants, Leaves and Flowers for Gel Plate Printing
Which botanicals give the crispest, most detailed gel plate prints - the rules of flatness and texture, and the leaves and flowers I reach for again and again in my workshops.
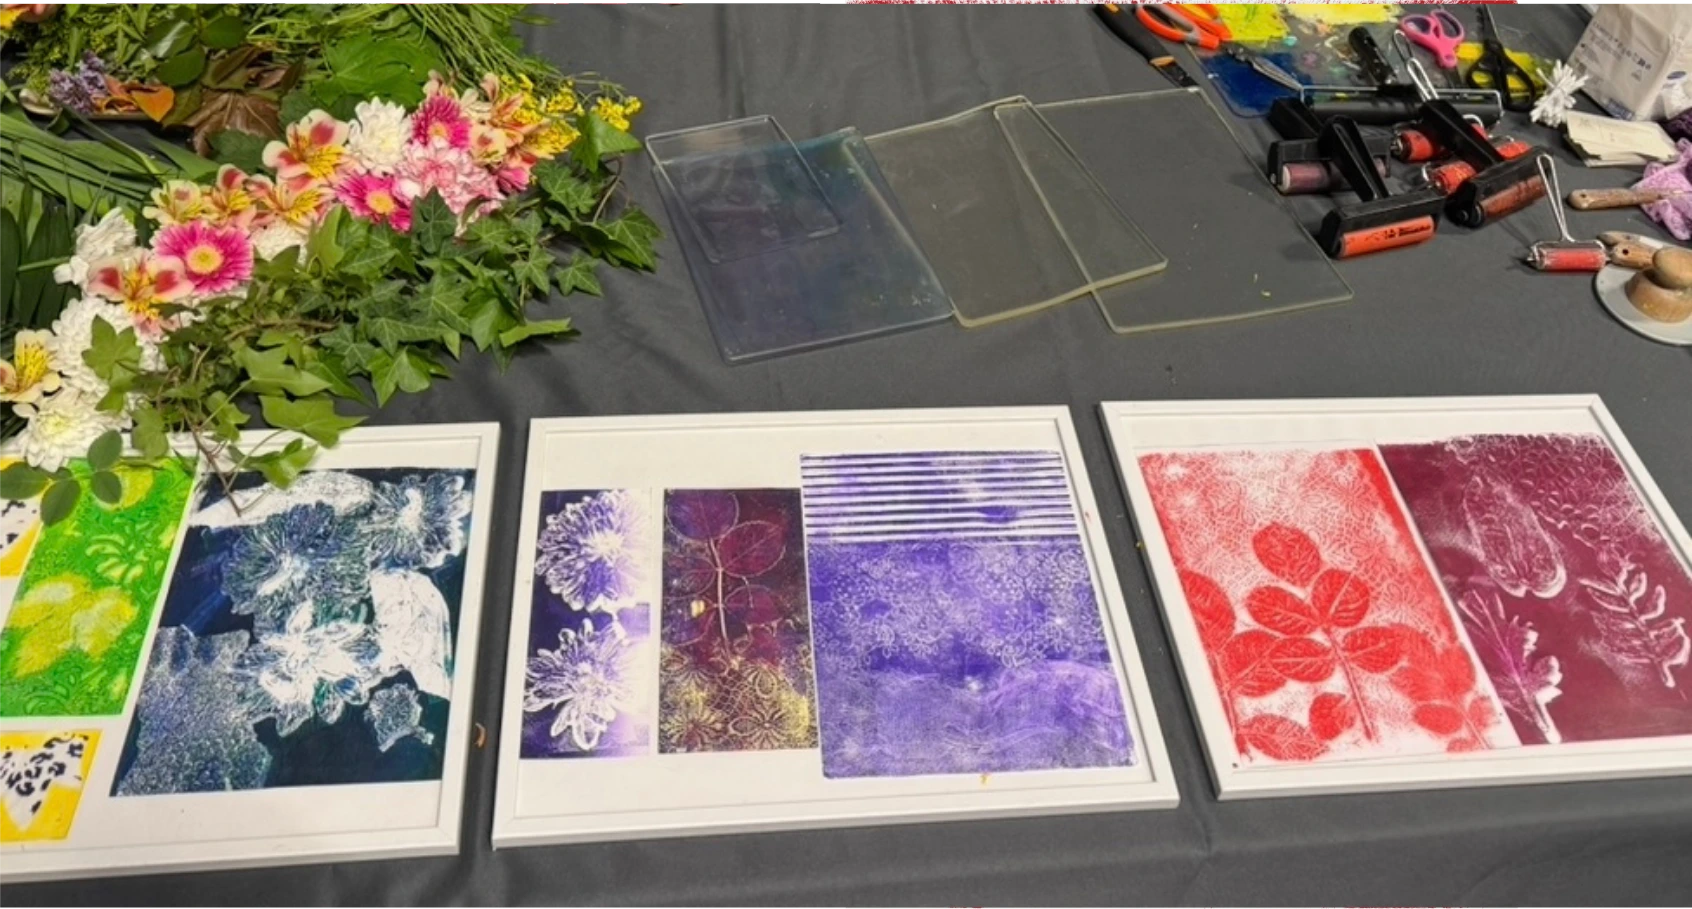
Working with a gel plate is one of the most therapeutic, experimental, and rewarding activities in contemporary applied arts. This unique material allows us to place anything with texture onto it, such as lace, cardboard, plants, and even print pages from magazines. The plate opens up endless possibilities for combining countless textures and colors.
The magic of this technique is that you never know exactly what the final result will be. And when you bring real elements of nature into the mix, things become truly magical. Using natural botanical materials allows us to capture the delicate textures of leaves, veins, and flower silhouettes in an inimitable way.
As an art teacher with years of experience teaching and running workshops, today I will share my observations both from my personal experience and from my practice with my students. In my workshops, I often see the challenges and experiments people go through until they truly understand the unique character of different plants.
The good news is that you can get a print out of almost any plant on a gel plate, whether it's just the basic shape or a highly detailed print. In this article, I will introduce you to the best plants and flowers for printing and share a few professional tricks to achieve crisp, detailed, and high-contrast botanical prints every single time.
The Golden Rules of Choosing Plants for Your Gel Plate
Before you head out on a leaf hunt in the park or garden, remember these three important rules, tested in dozens of my classes:
Flatness is Everything
Plants that are naturally flat, soft, and flexible always yield the best results. Rigid and woody parts create "air pockets" that prevent the paper from adhering tightly to the plate around their edges. That is why, for example, cherry tree twigs or rosemary branches with thick stems are not suitable if you are looking for perfect detail.
Avoid Thorns and Sharp Textures
We shouldn't forget that this is a gel plate, which can be damaged, and once torn, it cannot be repaired. Thorny stems or sharp, stiff twigs can easily scratch or puncture it. However, don't worry too much because the plate isn't that fragile either!

Texture and Paint Quantity
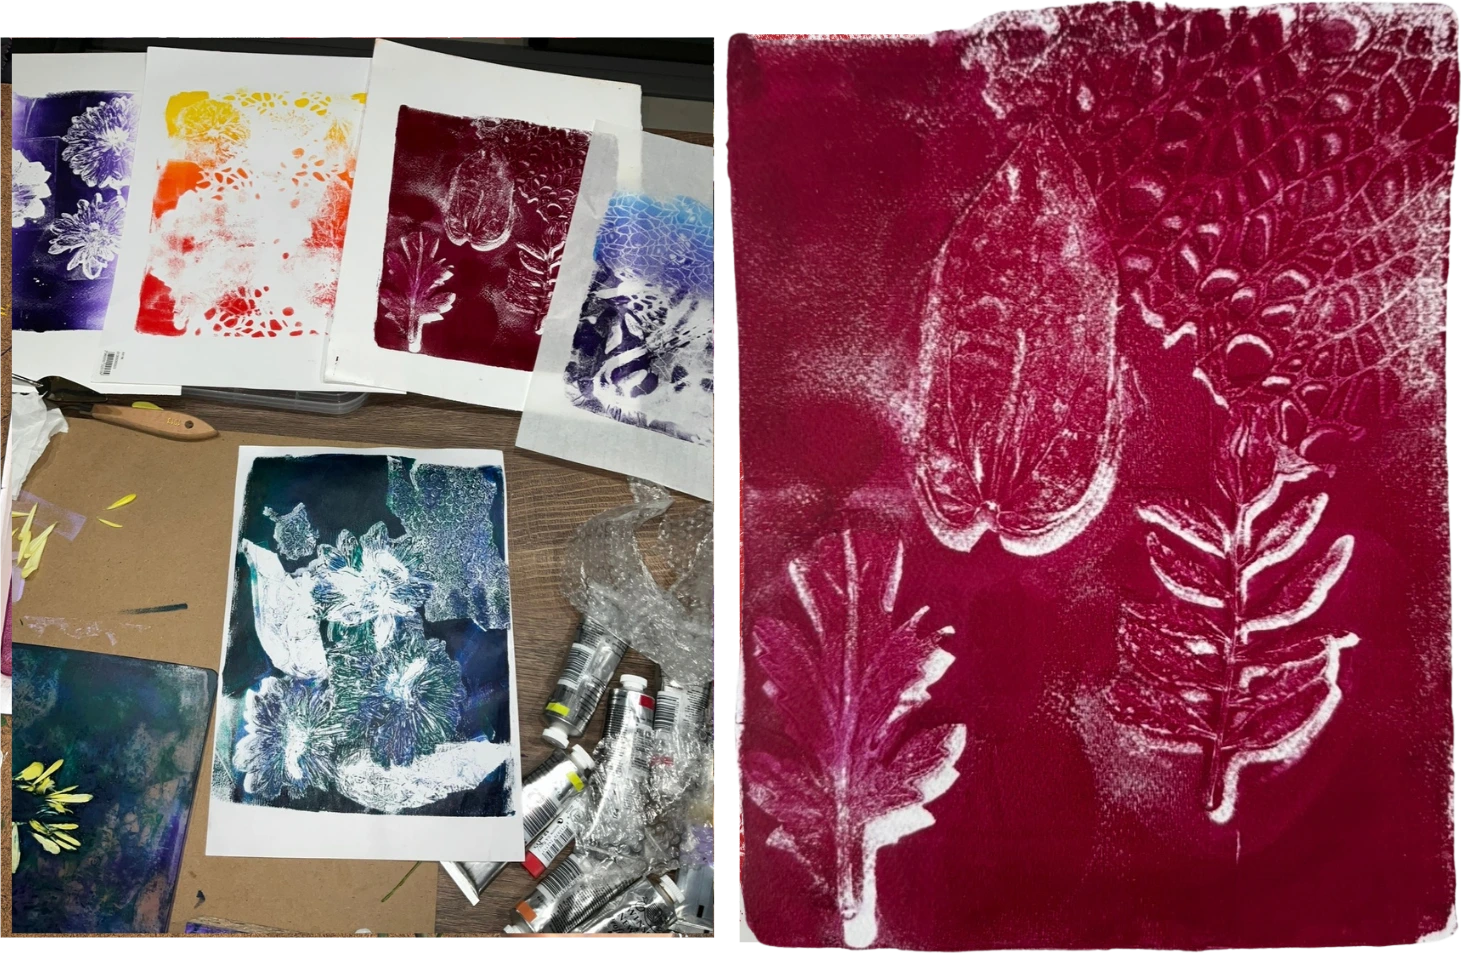
Look for leaves with deep, prominent veins on their underside. The rougher and more textured the back of the leaf is, the more impressive your prints will be. If you really want to get a print from finer and smoother leaves, the amount of paint on the plate should be minimal.
The Best Plants for Botanical Monoprinting
Take a Walk in the Nearby Park
There will be very few leaves that won't work for your print during a walk in the park. Sycamore, maple, and ivy leaves offer classic, graphic shapes that look great as a focal point in collages or standalone paintings. Their thick and prominent veins trap the paint beautifully.
If you want to experiment with layers, grape leaves or chestnut leaves are perfect! They serve as a wonderful large stencil shape. You can print them as a base, and inside their empty negative space, you can add something else, like a magazine transfer or a stencil pattern.
Wild Grasses and Delicate Flowers
Don't pass by the common weeds and wild grasses along the roadside. Plants like wheat ears, baby's breath (Gypsophila), bunny tails (Lagurus), speedwell (Veronica), lavender, and Green Trick Dianthus (green carnation) work wonders.
The long, fine lines of grass stems add a sense of movement, wind, and airiness to the composition. They work best as subtle details that will "come alive" on your artwork through the second layer, also known as the ghost print.
Sunflower, Carnation, and Chrysanthemum
If you try to print a large chrysanthemum, a carnation, or a sunflower head in the standard way, you won't get a perfectly crisp graphic print. Because these flowers are bulky and have dozens of layers of petals, they cannot press completely flat against the paper.
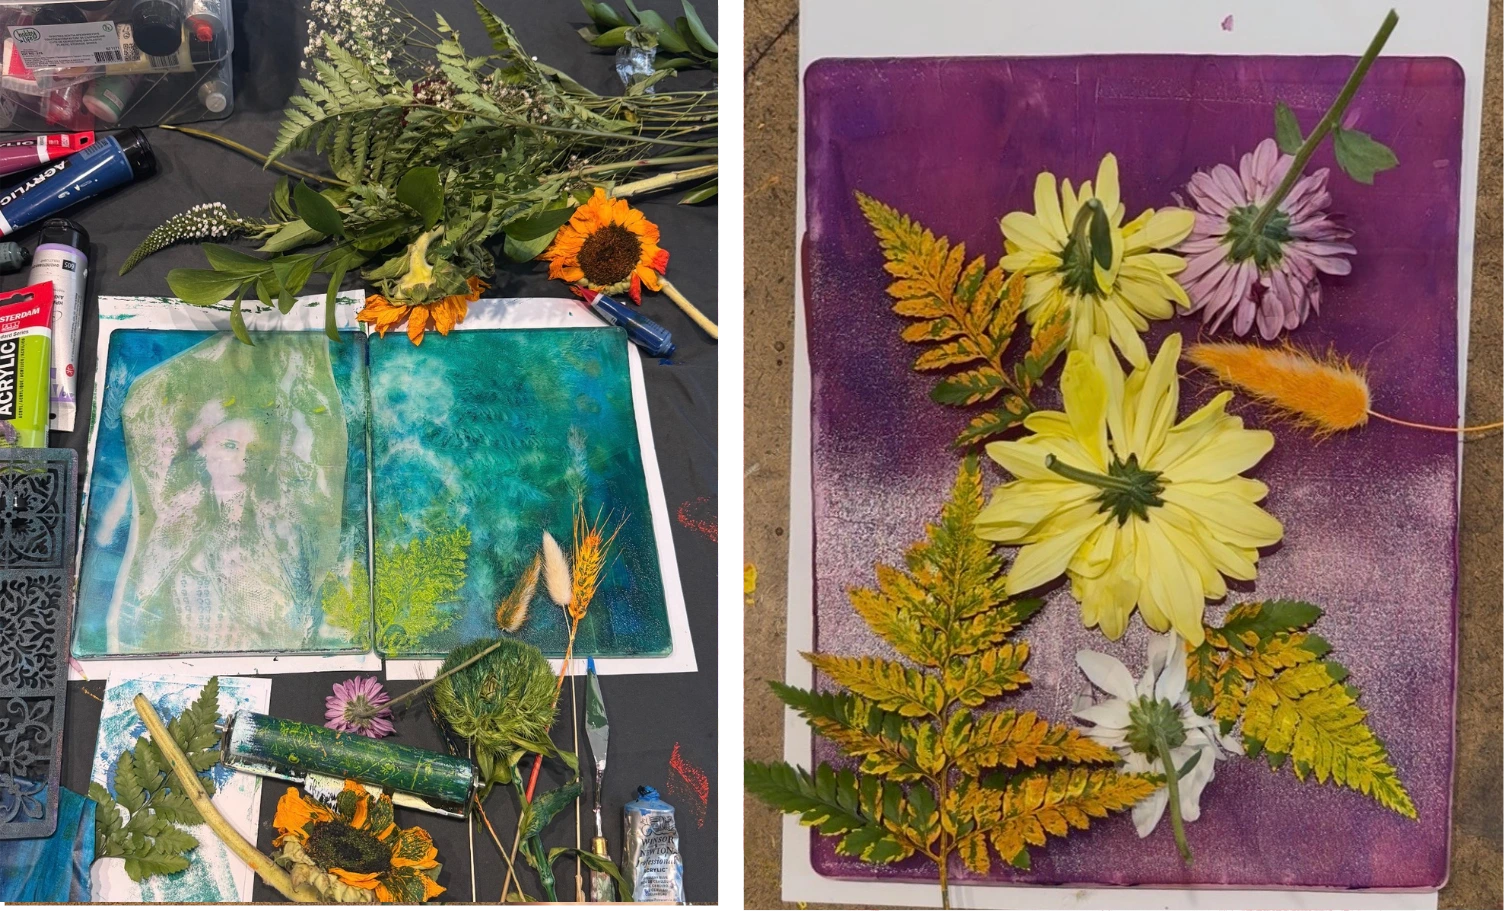
Instead of a clean silhouette, however, they leave behind stunning, rich textures and artistic imperfections that look incredibly striking in more abstract projects.
Don't forget that leaves and flowers can be used more than once! The key is to pick them up quickly after the first pull and gently wash off the paint without damaging them. This way, you will be able to make 2 to 3 consecutive prints from the same plant. With each subsequent print, the fine details will fade slightly, but you get wonderful pale backgrounds that are perfect as a base for the next layer.
You can also try printing with pressed, herbarium flowers, and the same rules for flatness apply to them. Use recently dried plants, as older ones are too fragile and will easily fall apart upon contact with the paint. Keep in mind that with dry flowers, the details of the veins cannot be fully transferred, so it's better to use them simply for their beautiful silhouette.
If you prefer to see this exciting process firsthand, you can watch the step-by-step videos of how some of these paintings were created here.